System Requirements
Please make sure your hosting server meets the PrestaShop requirements:
- Supported operating system: Windows, Mac and Linux.
- Wamp (for Windows) or Xampp (for Windows and Mac)
- Web server: Apache Web server 1.3 or later, Microsoft’s IIS Web server 6.0 or later.
- PHP 5.2* or later.
- MySQL 5.0 or later.
- At least 32 Mb of RAM on your server (64 Mb is comfortable, the more the better).
Note: If you can not import the theme/module file to your server due to the maximum upload and PHP memory limit, you need to increase the parameter memory_limit=200M; max_execution_time=300; max_execution_time=1000 upload_max_filesize=20M in the file php.ini.
Prestashop 1.6 Installation
1. First of all, Download the latest Prestashop package from the PrestaShop's Official website.
2. Using a Zip tool (like WinZip for Windows OS or Stuffit Expander for MAC OS), extract the content of the archive to a known location on your hard drive (for example, the Desktop).
3. Zip the content of prestashop_1.6.x/prestashop folder into an archive.
4. Upload the new zipped file to your server, using File Manager of your hosting control panel or any FTP-client software (FileZilla or Total Commander, for instance).
5. Extract the file on your server. To launch the installer, simply browse to PrestaShop's location on your web server: the script will automatically detect that PrestaShop is not yet installed, and will take you to the auto-installer. From there on, you just have to read and click. The installation contains 6 steps as following:
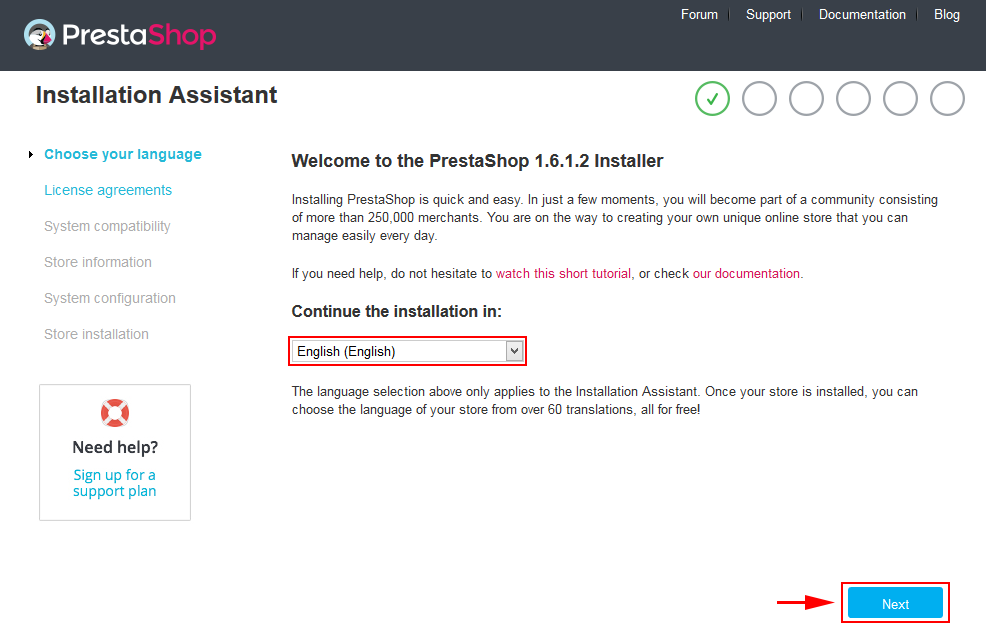
Step 1: Choose Your Language
Select the default language to install on your site, then click the "Next" button.
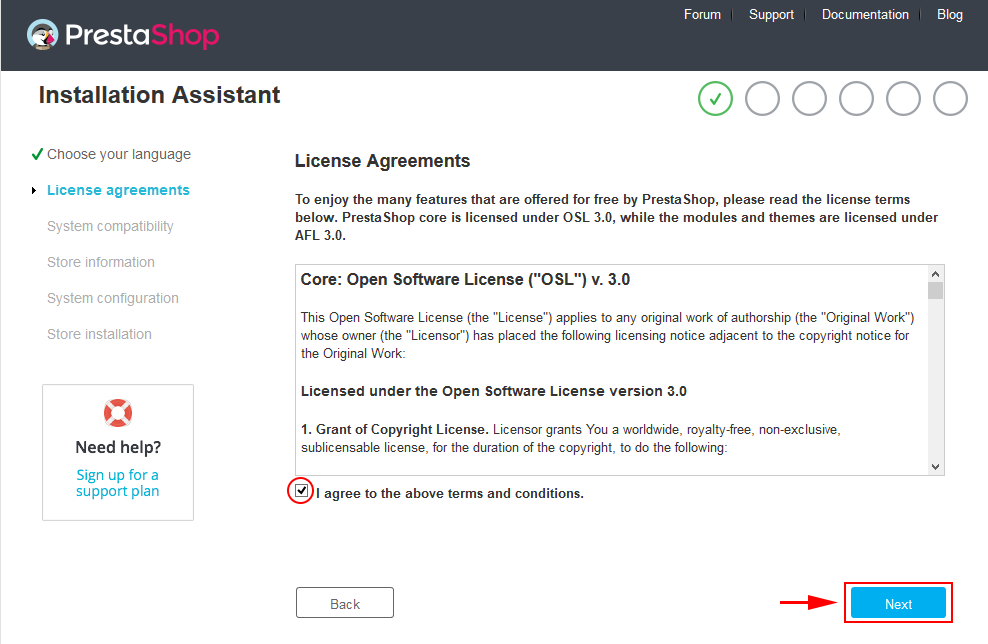
Step 2: PrestaShop's Licenses
The next page is the License Agreement, please check the "I agree to the above terms and conditions" box, then click "Next".
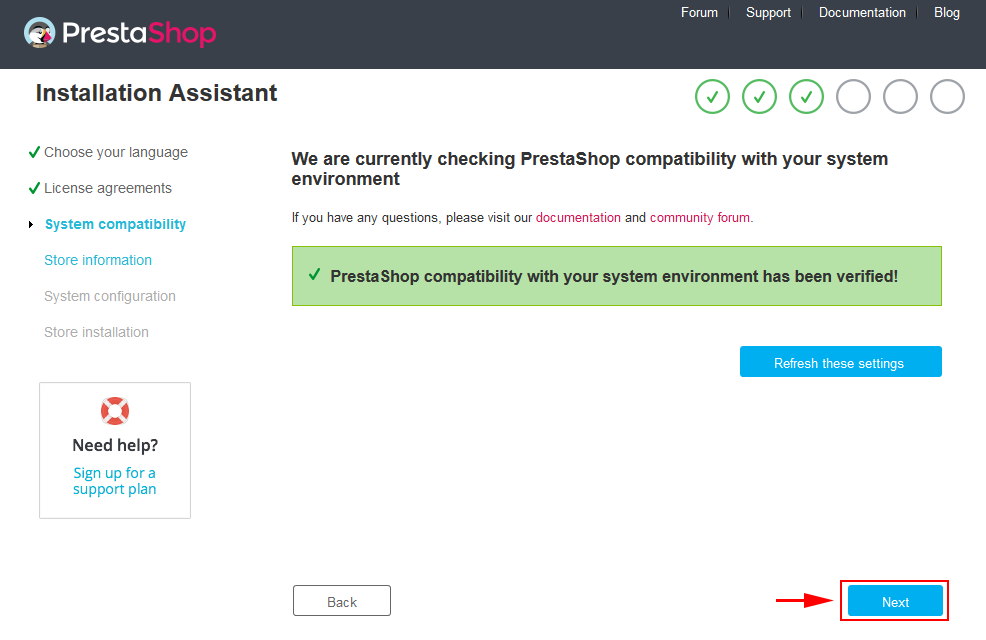
Step 3: System Compatibility
Check the PHP settings and directory permissions. If you meet any issue, please contact your hosting provider for further assistance.
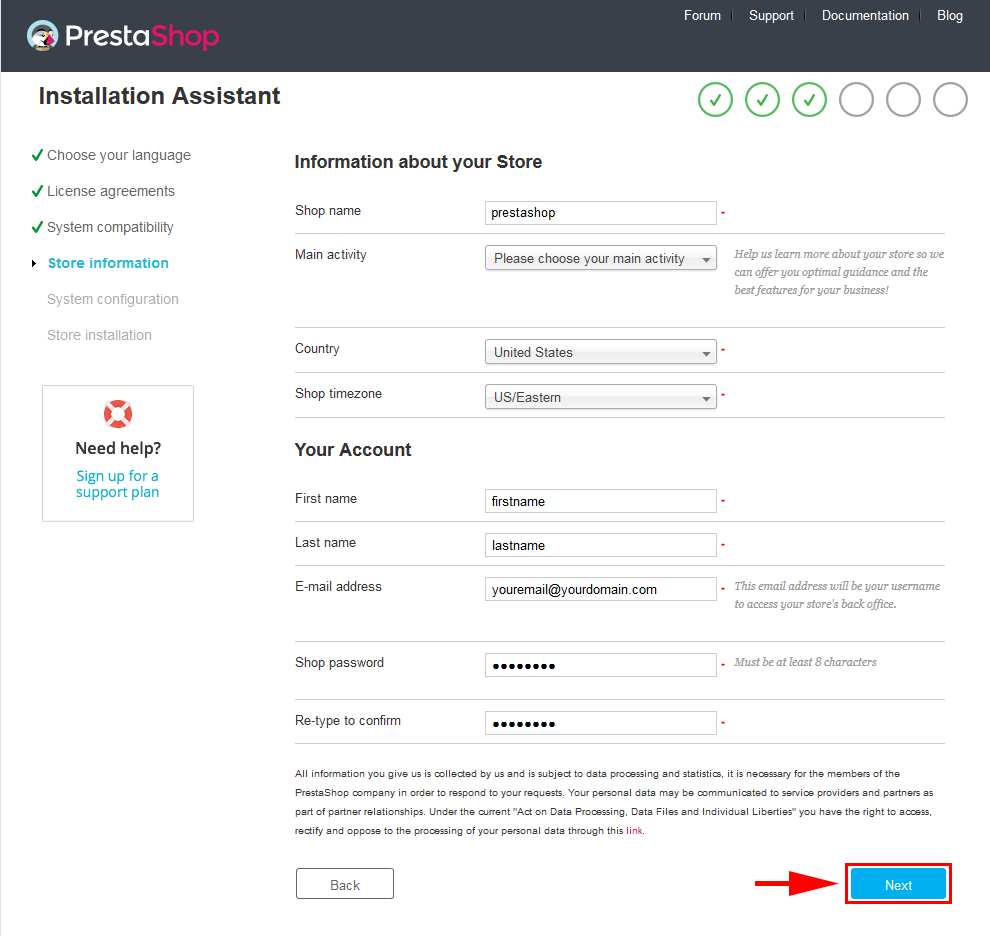
Step 4: Store Information
In this store information page, add your store details: store name, the country that your store is located, and your store account details.
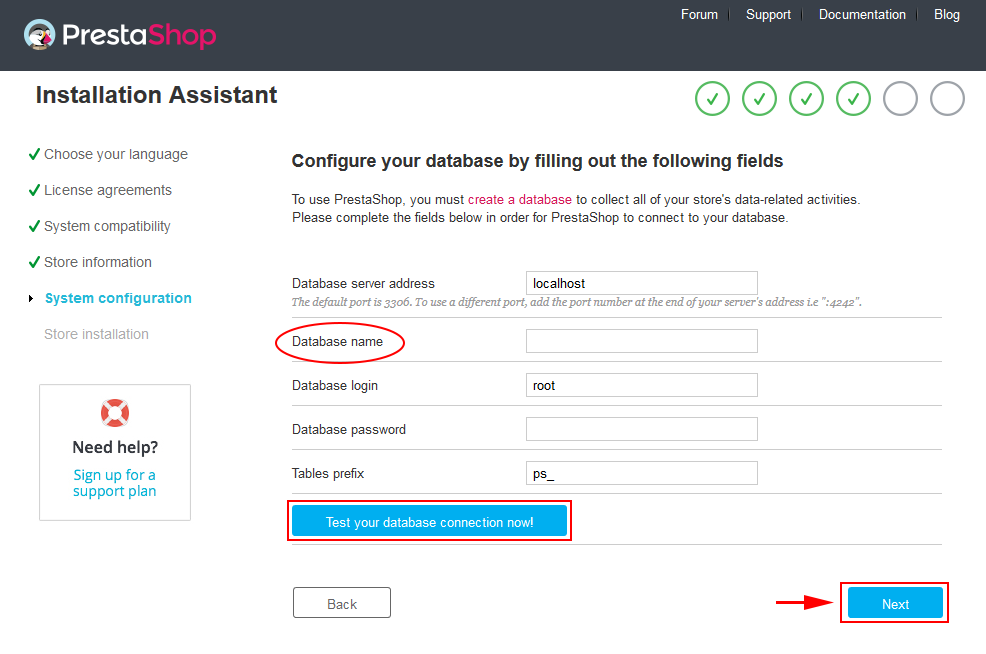
Step 5: System Configuration
This page is the database configuration panel, we need to create the database first.
Let's login your PPHMYADMIN to create a new database and add it in the System Configuration page. You should select the "utf8-general-ci" collaboration.
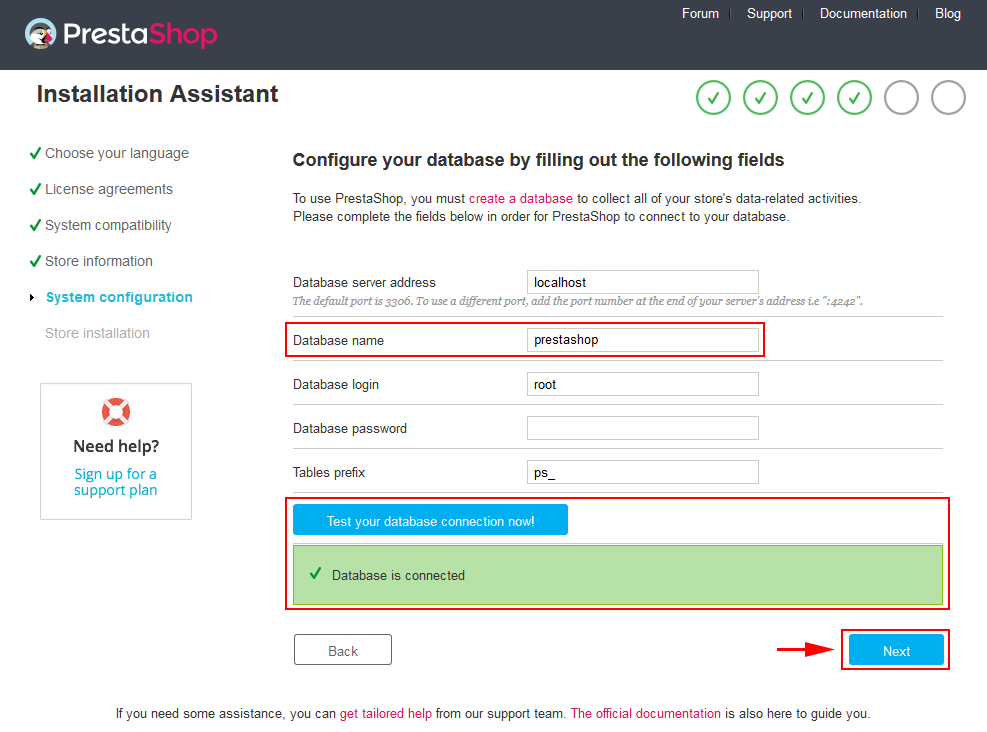
When the database is created successfully, copy and paste its name into the Database name field, then click the Test your database connection now! button to make sure that the entered settings are correct. If they are, you will see a Database is connected message. After that, you could click the Next button to move to next steps.
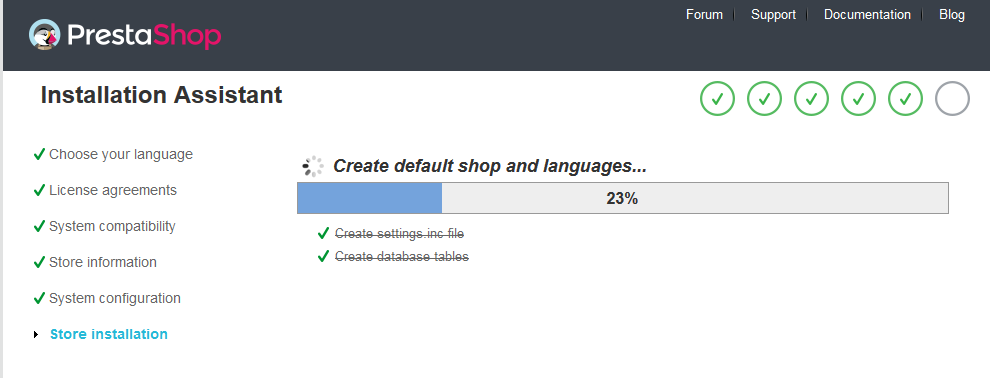
Step 6: Finish Installation
This process might take a few minutes. Once the installation is completed, you need to open the PrestaShop installation directory and delete the /install/ folder to improve your PrestaShop store security.
The Prestashop 1.6.x was successfully installed. Now you can log into the PrestaShop back-office by going to your newly-renamed "admin" folder, and start modifying your store. Now you are also able to install new themes.
Hope this tutorial would help you install the Prestashop 1.6 website quickly. If you have any questions or need further assistances, please don't hesitate to let us know via the comments box below. We are happy and ready to help you guys.


