Step 1: Get Zopim Addon
Firstly, you need to create an account on Zopim website to get the Zopim Live Chat addon. Once you finished, please log into your Free Account and then navigate to the Setting section >> Choose Widget.
Now copy the embed code that is displayed in front of you.
Step 2: Integrate Zopim with your Magento 2 store
Magento 2.0
- On the Admin sidebar, click on Stores. Then under Settings, choose Configuration.
- In the panel on the left under General choose Design.
- If you have multiple stores or views, set Store View in the upper-left corner to the view where the configuration applies. Then, clear the checkbox after each field so new values can be entered.
- Expand the
Footersection - In the Miscellaneous HTML field, paste the copied code.
Magento 2.1
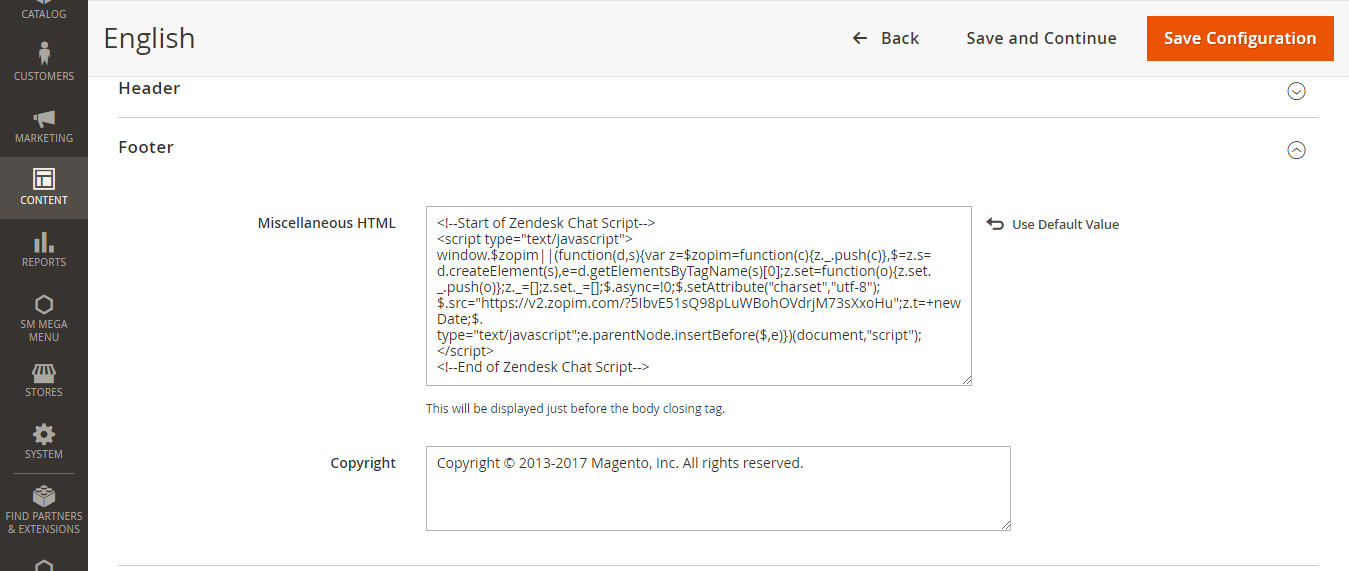
- From Magento 2.1, this path was changed. It is located at Content > Design > Configuration
- Select the store you want to integrate Zopim > Find Footer. Expand the Footer section and paste the Zopim script in the Miscellaneous HTML field
- Save the changes on your website and access the front-end. You will be able to see the Zopim widget displayed at the bottom of the page.
Thanks for reading!


