Follow this guide to configure swatches in Magento 2
There are 2 steps to configure color swatches in Magento 2:
- Create the Swatches
- Update Your Product
Step 1: Create the Swatches
Firstly, go to the Admin Panel, expand the Stores tab >> Attributes section >> Product option.
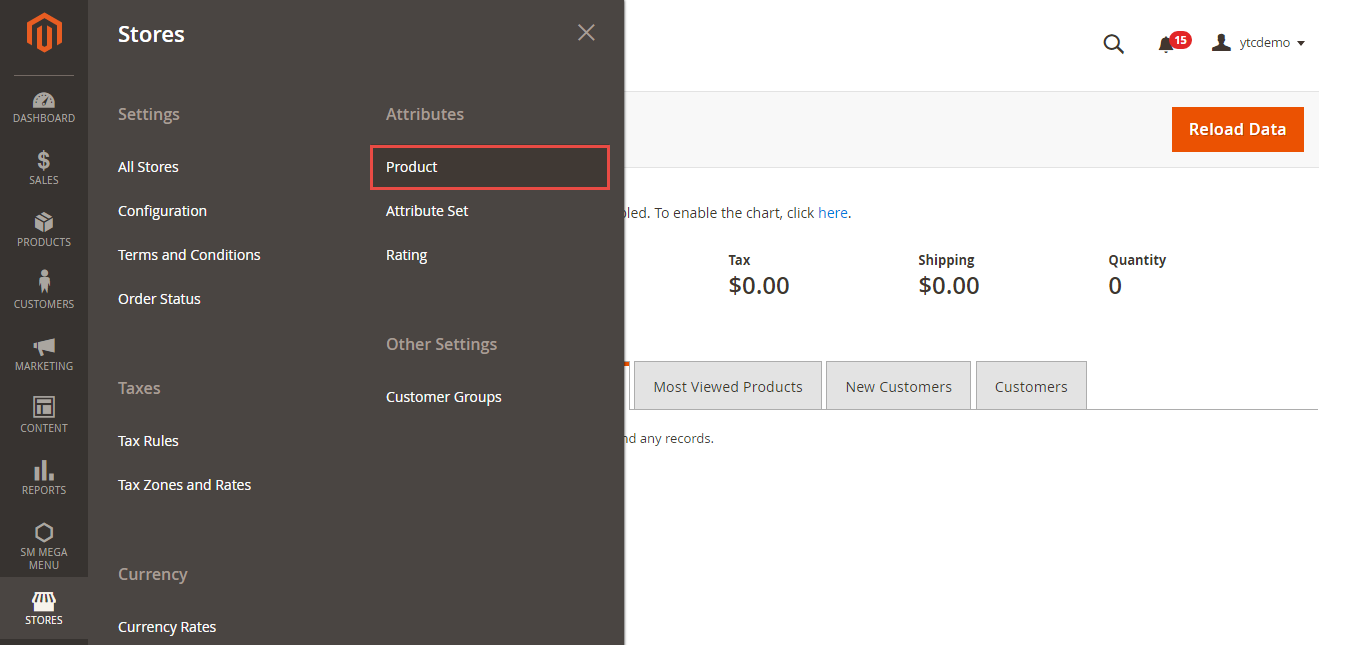
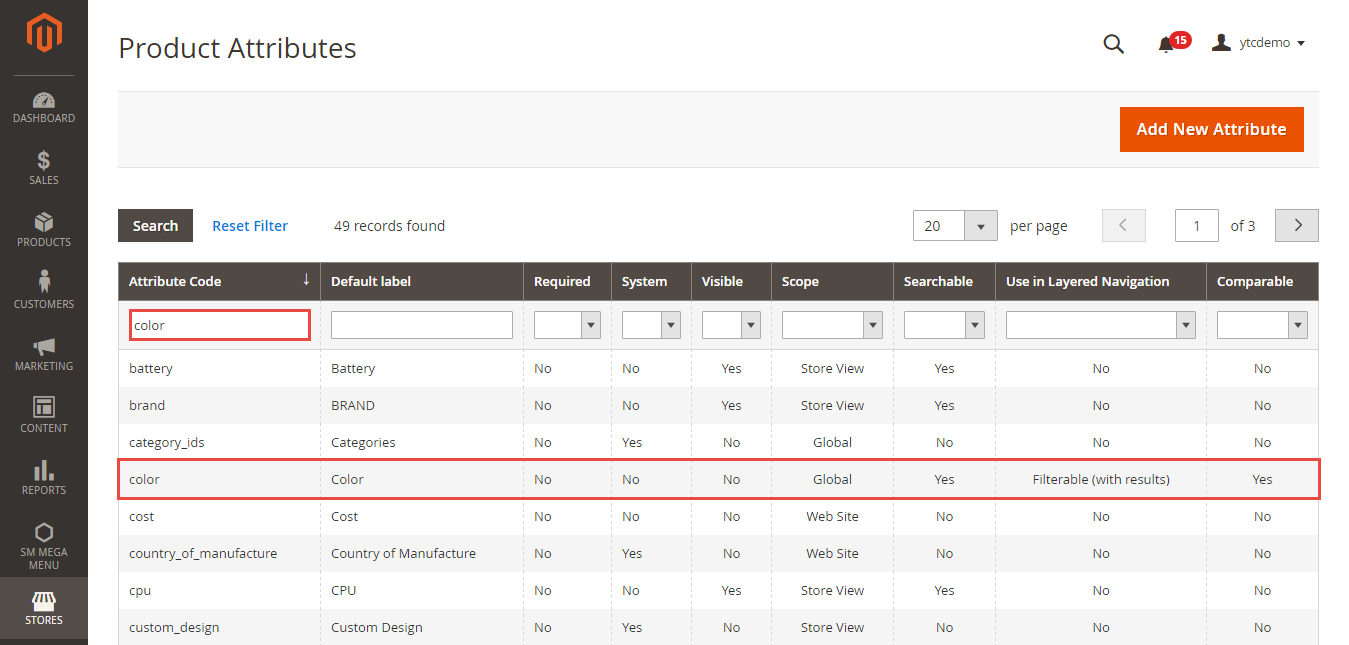
Then, find and click the Color attribute option.
From the Properties tab, you can configure all the available swatch settings:
- Catalog Input Type for Store Owner - Allows you to define the input type. You can select from the dropdown menu: visual swatch or text swatch.
- If you choose a visual swatch, then you can add the colors you need and fill in text descriptions. Besides, you can replace colors with images
- In case with a text swatch you can define values only as text
- Update Product Preview Image - Filtering by this attribute will update the product image on catalog page
- Use Product Image for Swatch if Possible - Allows use fallback logic for replacing swatch image with product swatch or base image
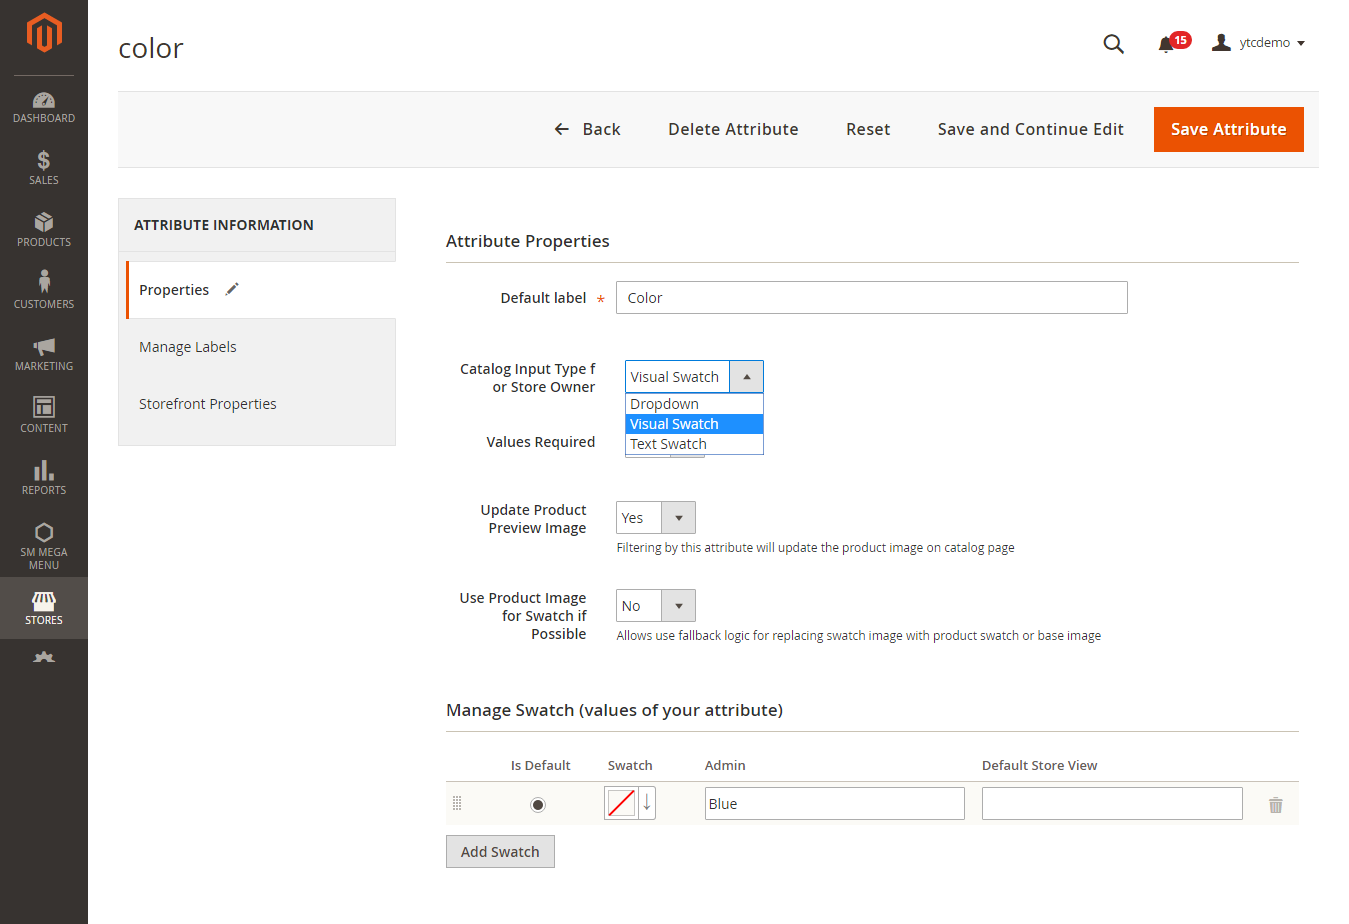
- Next, move to the Manage Swatch (values of your attribute) section.
- There are 2 ways to add swatch available on the Swatch menu. You can use one of them to create the swatches:
- Method 1: Add a Color Swatch
- Method 2: Upload a Swatch Image
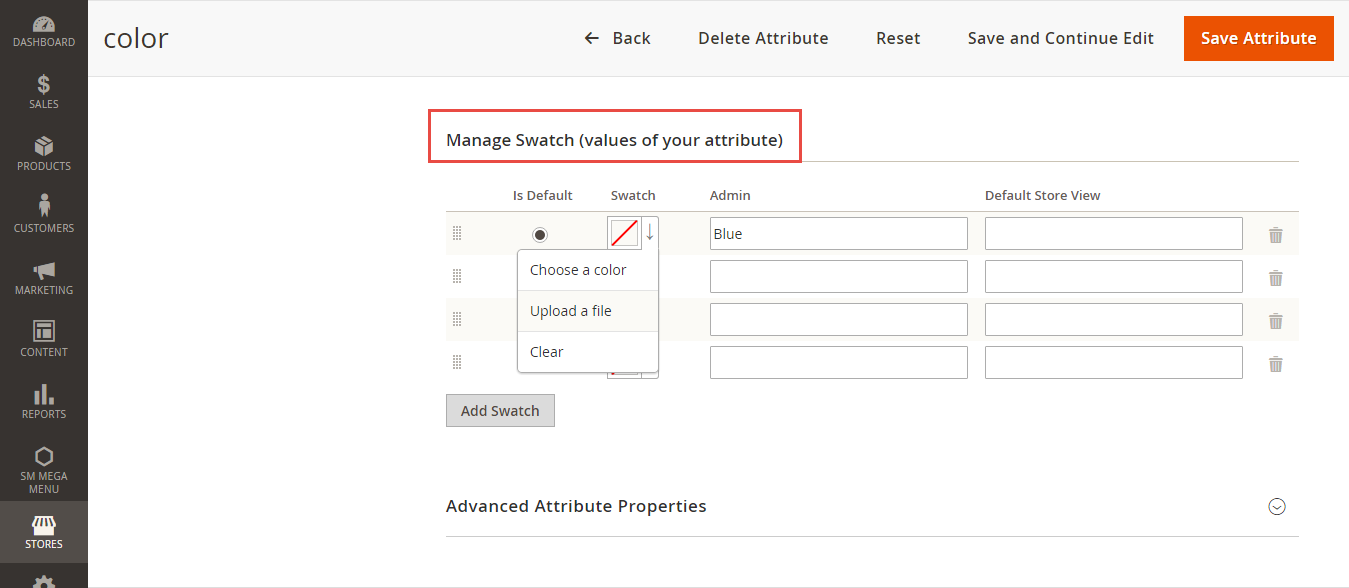
Method 1: Add a Color Swatch
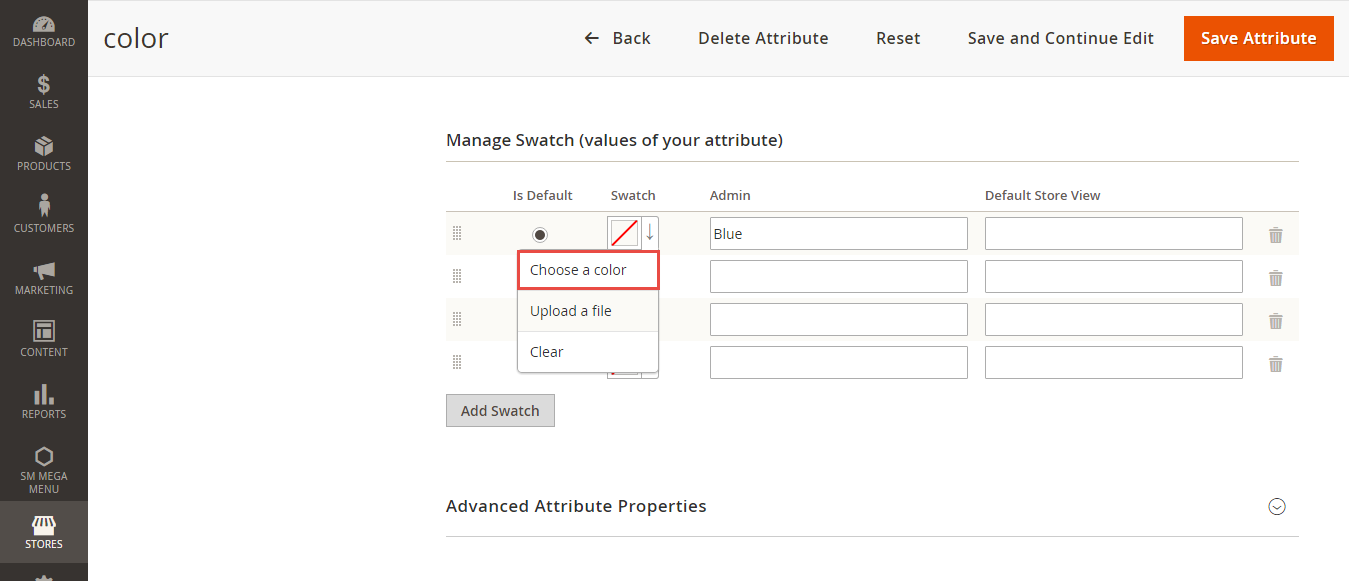
You might select Choose a color on the swatch menu.
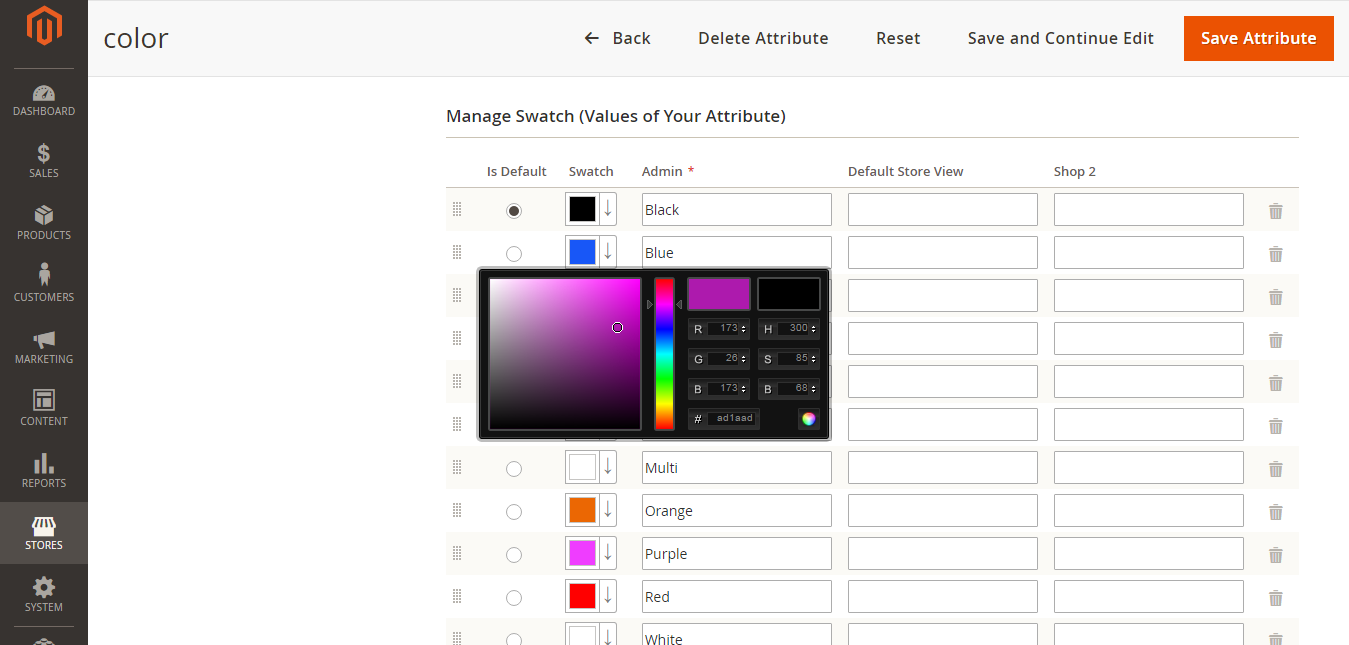
You can enter the value of the new color in the # field or and choose any color you want by using color picker. Then click on the Color Wheel button in the lower-right corner to save the swatch.
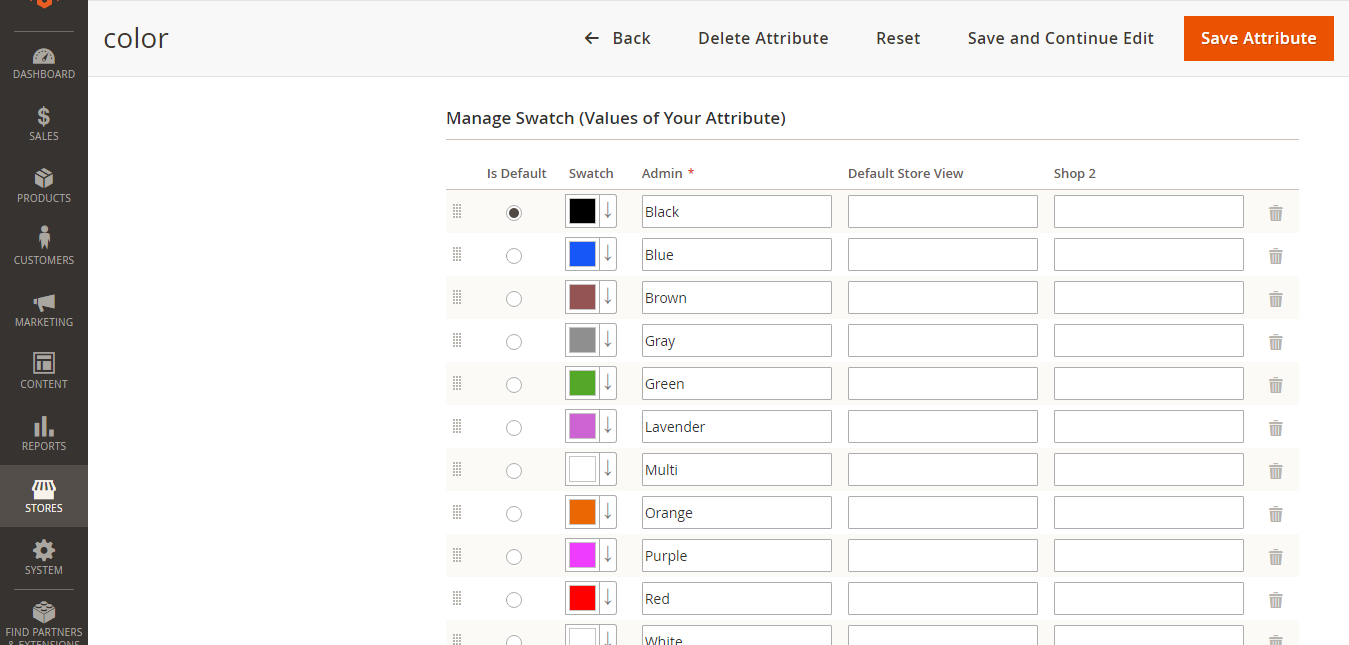
In the Admin and Default Store View, you might Enter the label for the color.
When it's done, hit the Save Attribute button.
Method 2: Upload a Swatch Image
Firstly, you should collect the swatch image that is correct for your product.
You might select Upload a file on the Swatch menu.
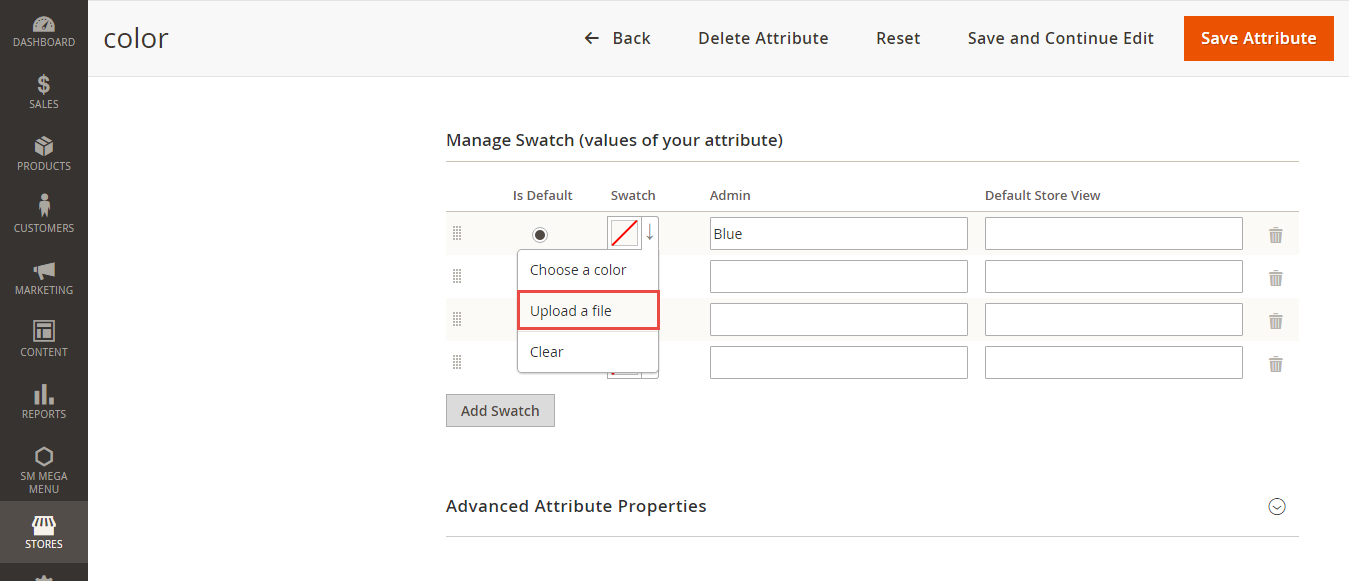
From your computer, you might Choose the desired image.
For other swatch images, you might repeat these steps.
In the Admin and Default Store View, you might Enter the label for the color.
When it's done, hit the Save Attribute button.
Note:
- To set the default color as you need, you might Mark the checkbox under the Is Default.
- When clicking on the icon in the top left of Manage Swatch table and drag it to the new position, you might enable to change the order.
Step 2: Update Your Product
You need to attach a newly created or modified attribute to specific products.
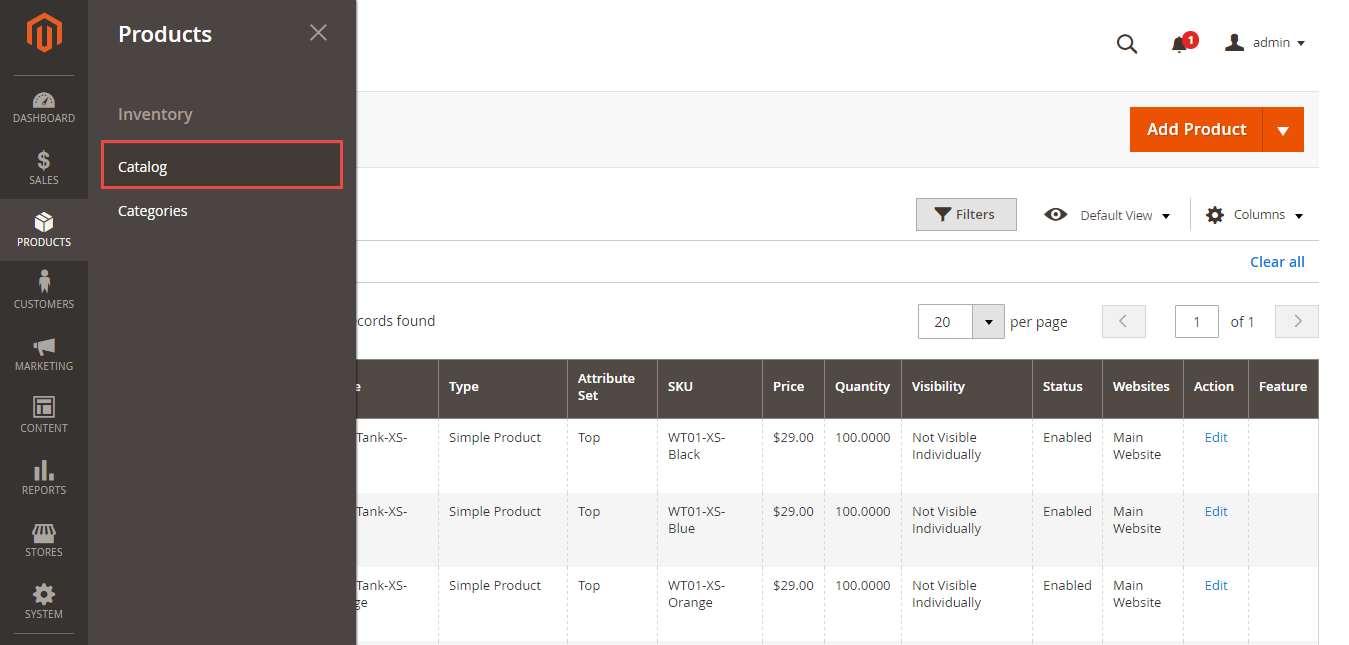
Navigate to Admin sidebar >> click on Products >> choose Inventory >> select Catalog.
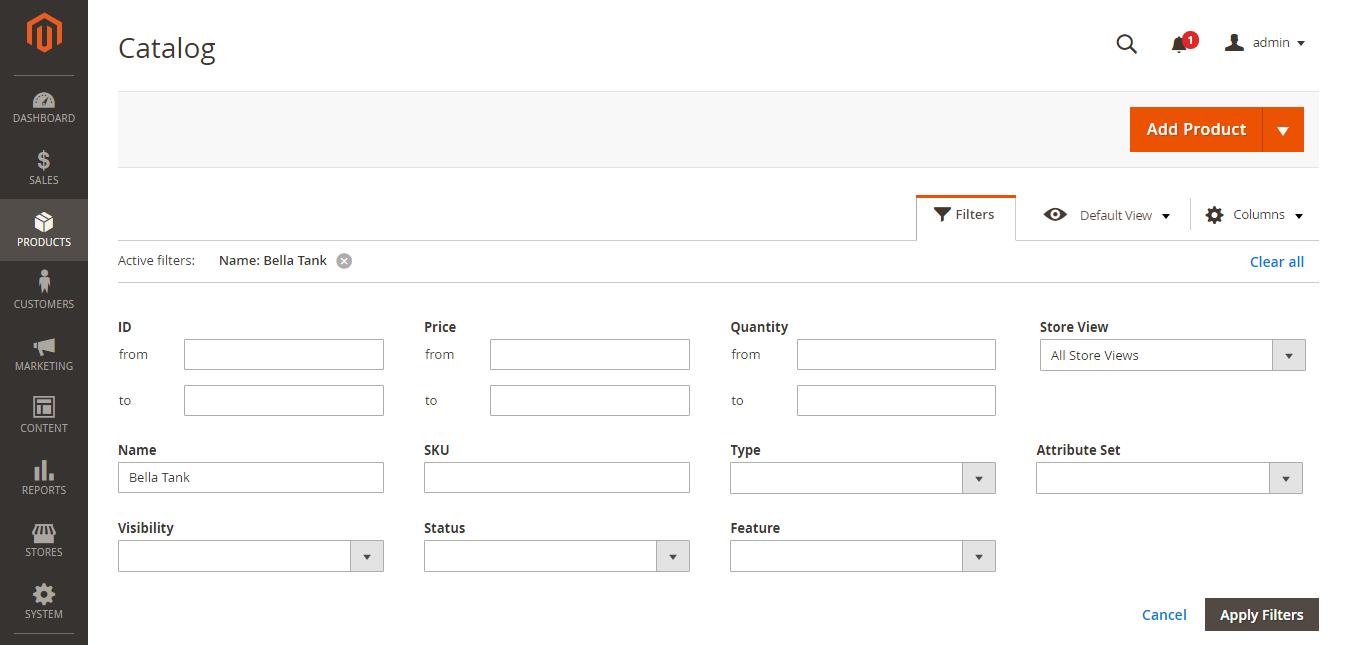
Filter the list by Name or SKU to include only the applicable products.
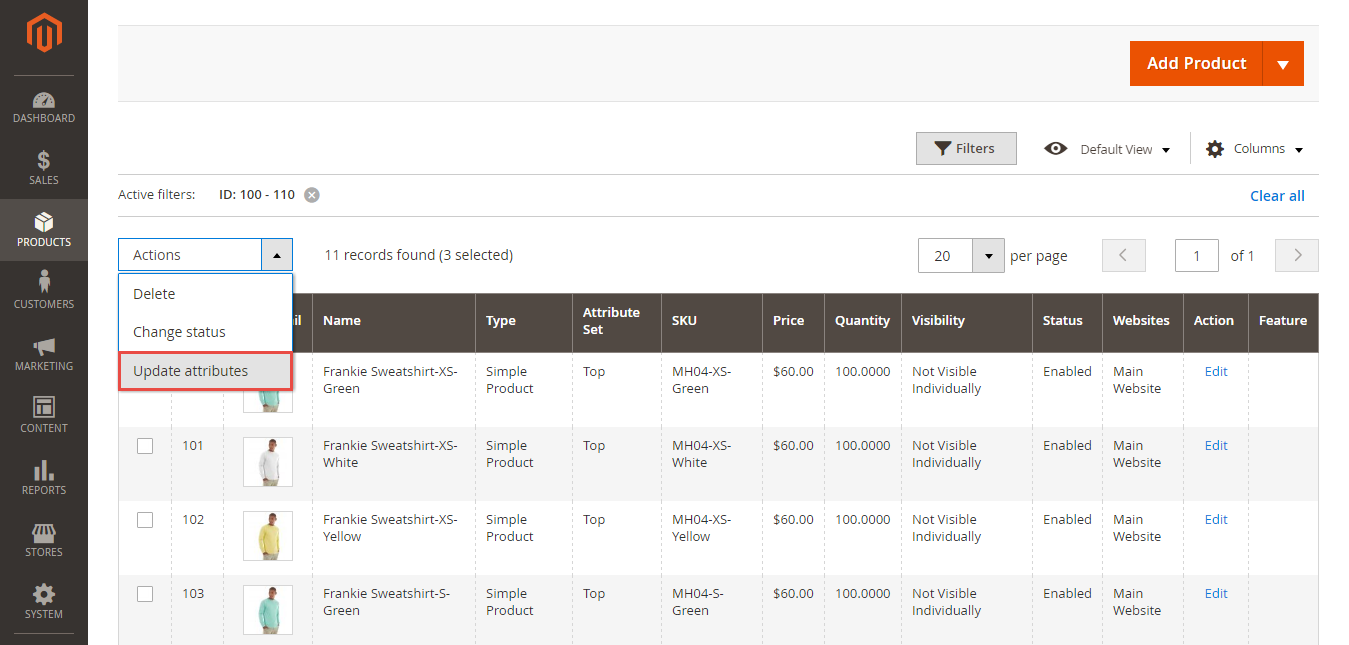
Select the Update Attributes option from the Actions dropdown.
Look down to the Color attribute, and mark the Change checkbox.
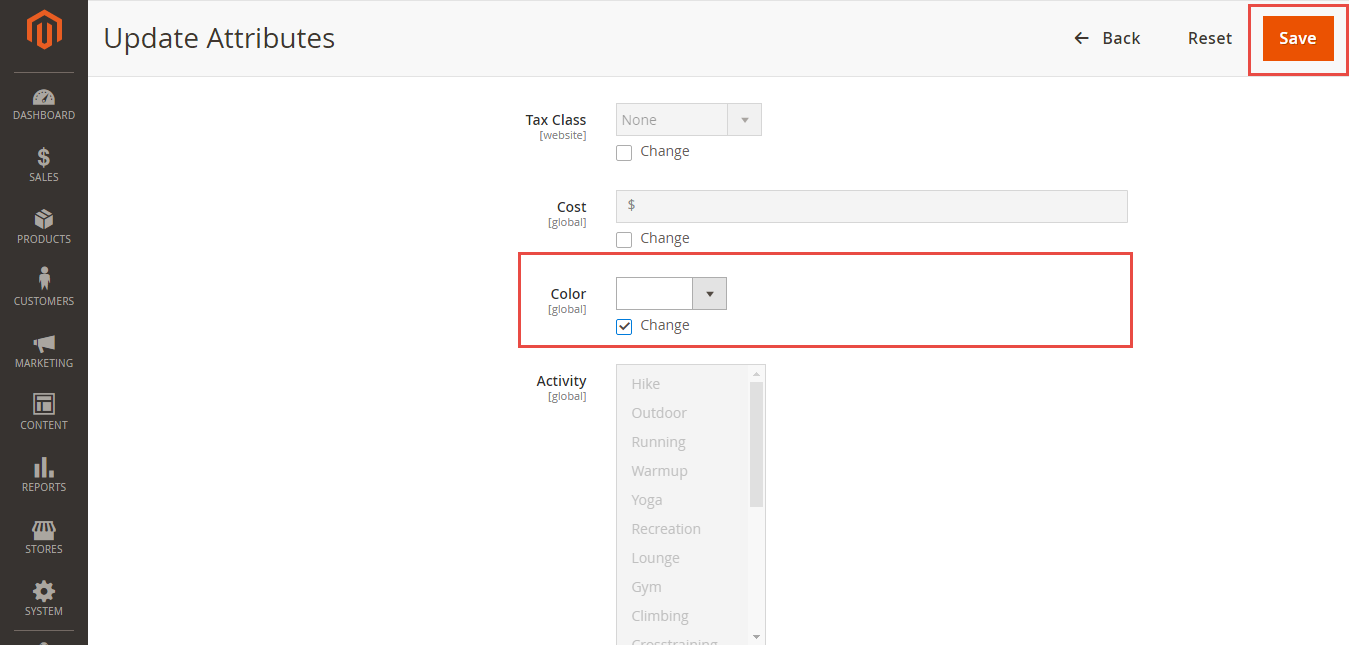
Finally, to apply an attribute, hit the Save Product button. Then remember to flush the cache in the Cache Management tab.
If you have any questions or need further assistances to configure Color Swatches in Magento 2, please don't hesitate to let us know via the comments box below. We are happy and ready to help you guys.
Thanks for reading!
